Getting Started: How to sign in
- Open Content Manager with this link.
- Select Edmonton Catholic Schools in the dropdown list
- Sign-in with your Microsoft credentials.
💡 note: If you cannot log in, please contact your principal to add you to the approved list.
Step 1 - Create a New Page
- In the top left corner, find the ☰ (hamburger icon) in the top left corner of the screen
- In the left navigation, click the Pages tab
- Look for the + add page button in the upper right-hand corner.
- In the modal that appears:
- Add a page title
- Under template, select Subpage
- Under structure, select WYSIWIG
(what you see is what you get)
- Click Create page
Step 2 - Add Content
Add content to the main content section. It's up to you! What do you want to create?
Please follow the following guide to ensure professional and accessible information. Always ensure:
- Proper syntax
- Common words are used correctly
Using the ECSD style guide ensures your messaging aligns with the Division’s professional standards. It promotes consistency in tone, terminology, and formatting across all ECSD platforms. By following the guide, your content will reflect the unified voice and identity of Edmonton Catholic Schools.
Keep Content Clear and Useful
When publishing content pages, aim for clarity, structure, and purpose. Keep in mind that some readers will have different levels of comprehension, digital literacy and even physical ability to navigate. Write accessible content by:
- Writing in plain, concise language
- Break content into short sections
- Add helpful links and visuals
- End with a clear and actionable steps
Add Formatting Elements
Within the text editor, there are many different ways to display your information. On our Demo School, learn to use:
Click on the guide below to see how these elements look live, and how to use them.
Step 3 - Publish the Page
Before publishing, please check:
- Spelling and Grammar are correct
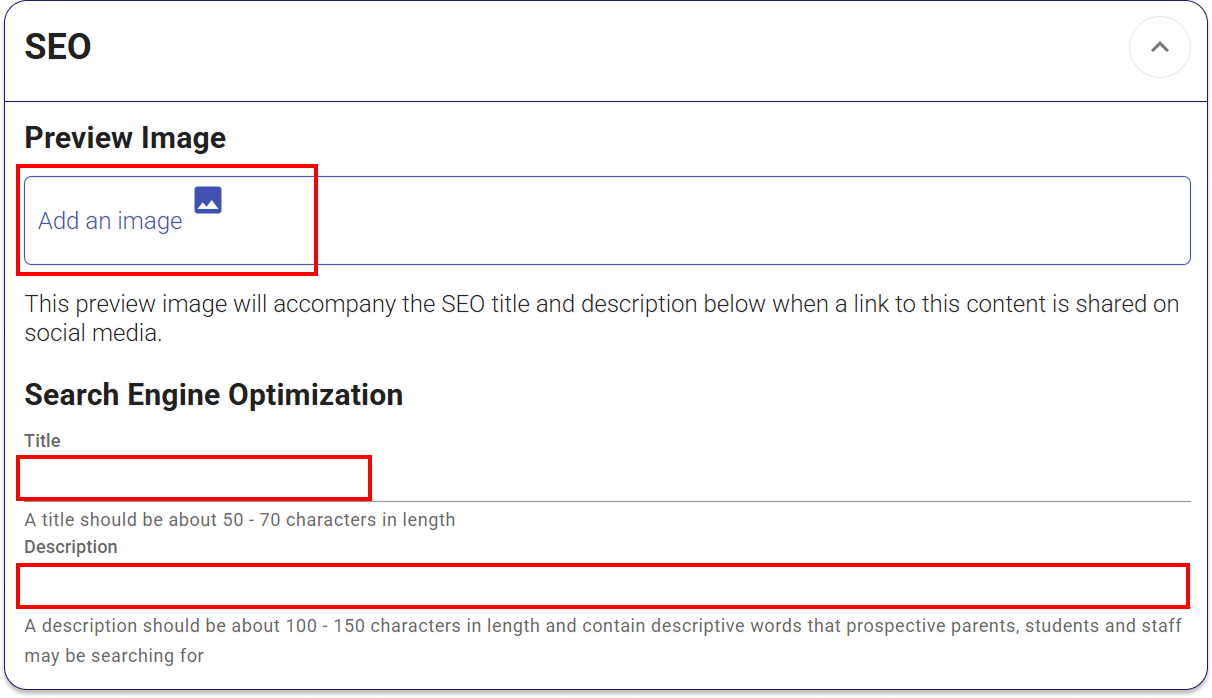
- SEO title and description (found below the rich text editor) are filled with helpful page info
- All images contain alt text. (add in the image manager tab)
- Page mode must be toggled to "Edit" and page version is "live"
You must select the Publish radio button and hit "Publish". The "save as draft" option will keep the page hidden so you can go back and make changes to a working draft.
Note: If your page is in draft mode, please save before changing to live

Once confirmed, click "Publish" make changes visible to the public.
You can now check the live version of this page with the eye icon.
Step 4- Add to the Main Navigation
To ensure users can find your information, please add your new page to the main menu.
Click here to learn how.

More Tips
Using Sandbox Mode
Welcome to Content Manager's newest feature!
The sandbox is where you and your team can collaborate on a draft before publishing changes.
The Sandbox creates a new version of your page that is hidden from the front-facing website. You may consider using this hidden page to if:
- You would like to update dates and information, and have the changes scheduled to publish on a specific date, at a specific time.
- You will be making edits over the course of multiple days, and avoid others making changes to your draft.
- You would like to collaborate with other staff over a longer period of time.
- You would like to keep other users from making changes while you are working on the page.
To use draft mode:
- Locate the dropdown in the upper right side of the workspace. Change it from live > sandbox
- The create in sandbox option will now be available. Click this to generate a replicate version of the page.
- Be sure to use the SAVE button frequently and before attempting to preview.
- When you are ready to publish your changes, first click SAVE, then change the radio button from Save as draft > Publish
- Publish as normal.
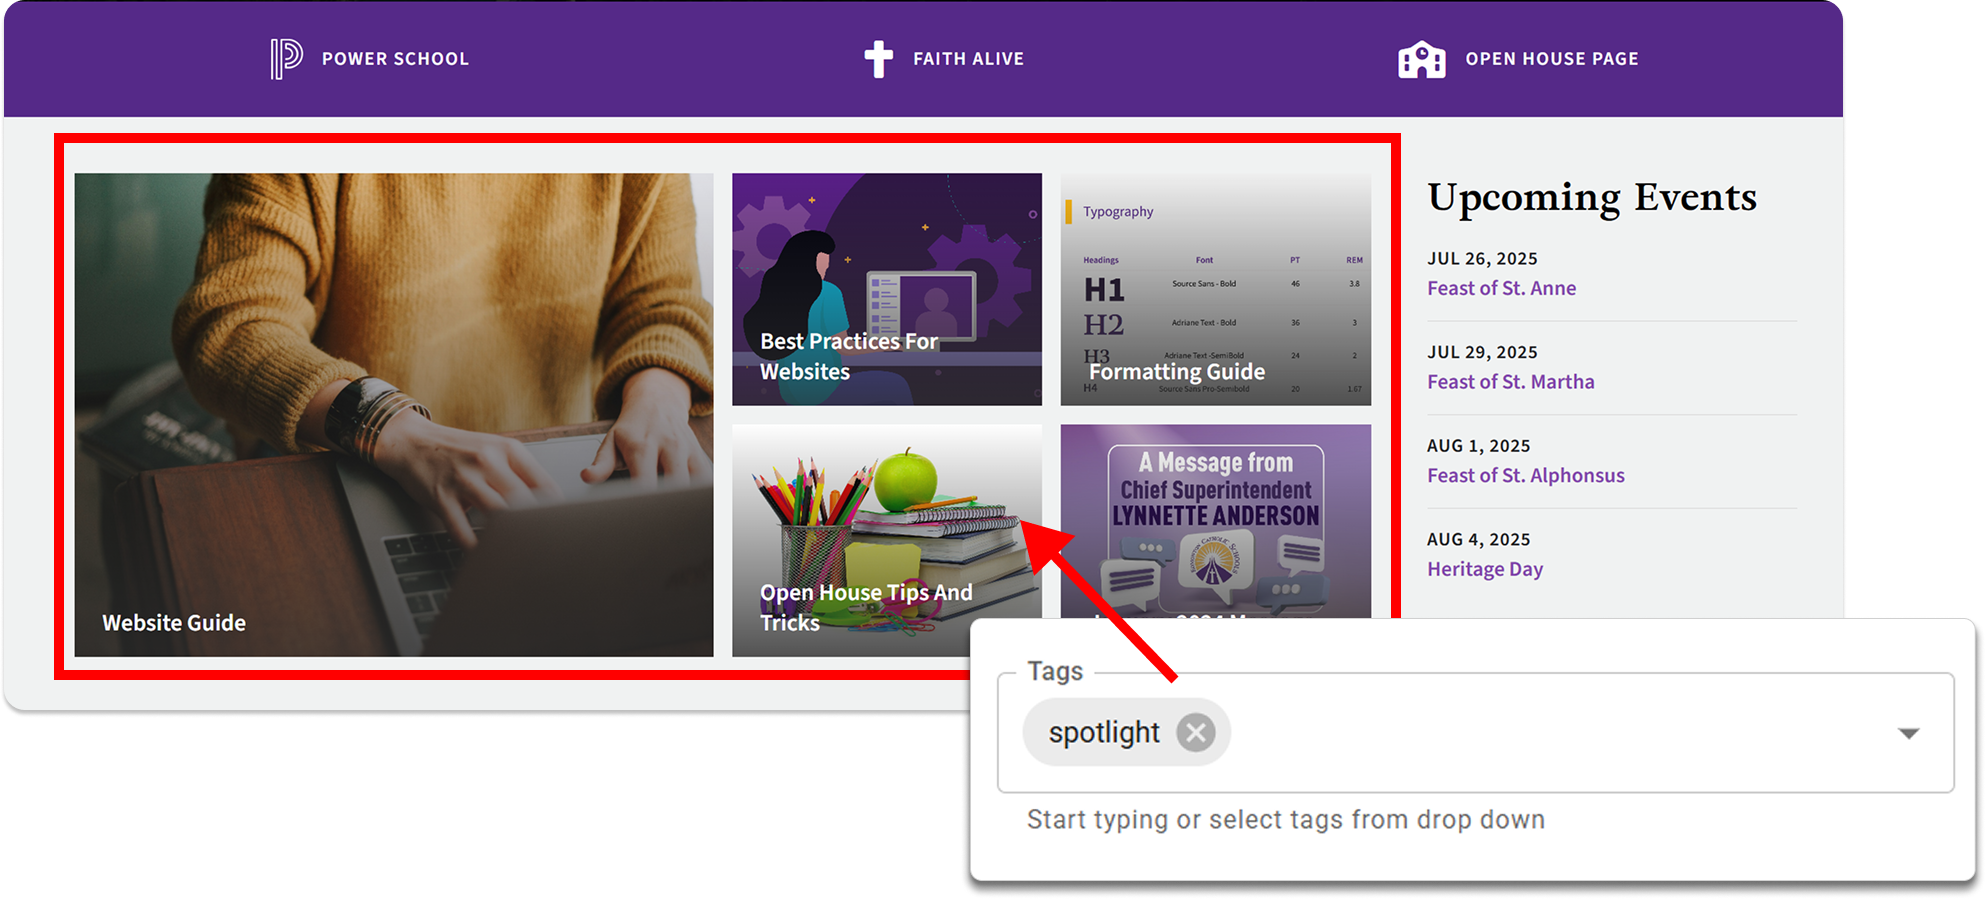
Add to the Spotlight
The Spotlight grid on the homepage is a great place to feature important and actionable information. You can pin pages or news posts to this section to keep key content top of mind for your users. It’s ideal for highlighting announcements or resources that need extra visibility.
- Open the Page Editor for the desired post or page.
- In the left navigation panel, locate the Tags dropdown.
- Select the "Spotlight" tag from the list.
- Save your changes by clicking Update Live
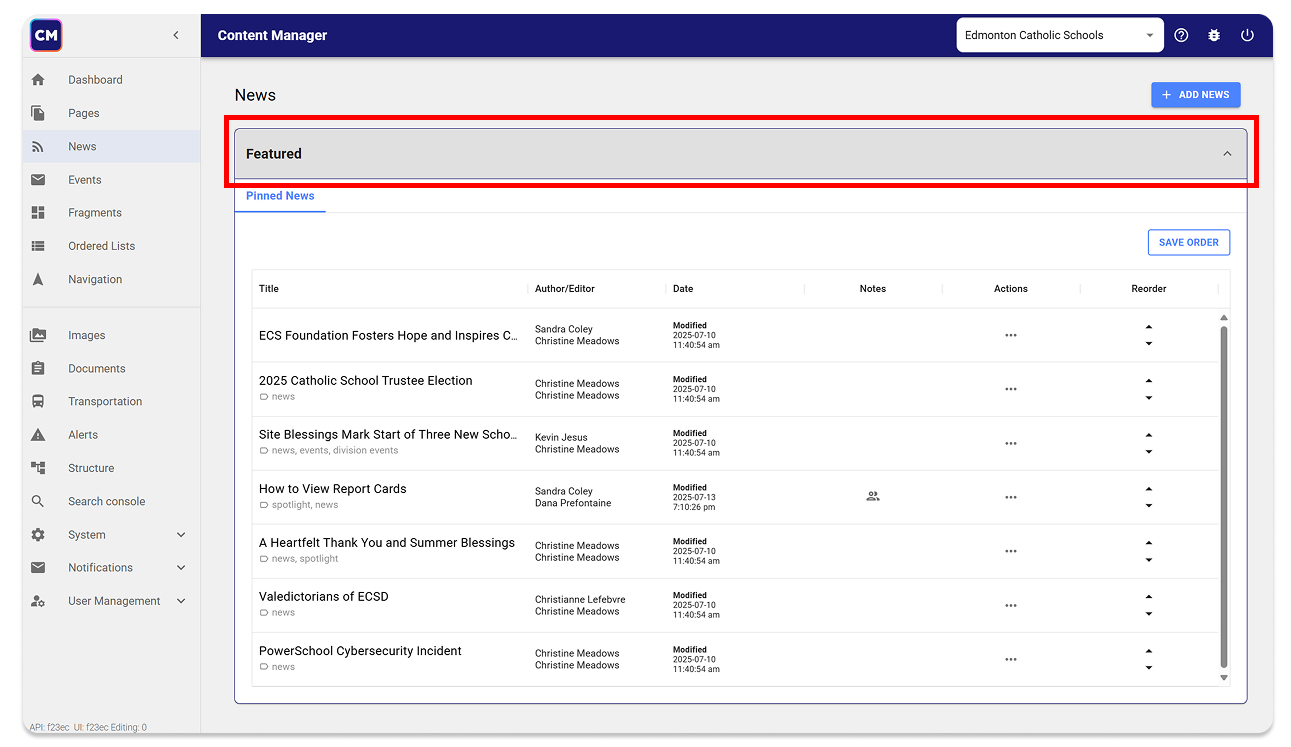
Pin a News Post to the Top of the Newsfeed
*Note: This only works for content created as a News post. Standard pages will not appear here.
If you want a news post to stay at the top of the news feed for a set period, consider pinning the post. This ensures it remains visible and easily accessible to your audience during its most relevant timeframe
- Pin post: While inside the page editor, find the Pin News toggle below the title and route in the left-side panel. When the toggle is turned on, it will look like this:
Please click Update Live once the change is made. - Changing the order of the spotlight posts: Click on the news tab to return to the post list. The ordered posts can be found under the Featured section. You may change the order of these posts using the ▴▾ icons.